How to Adjust the Timing Chain Tensioner on a Honda 400EX: A Complete Guide
Your Honda 400EX engine relies on precise timing to run smoothly, and the timing chain plays a big role in keeping everything in sync. When the timing chain tension isn’t set correctly, the consequences can range from annoying rattling sounds to serious engine damage. A loose chain might slap against other components, while an overly tight one can cause premature wear and strain on the system.
If you’ve noticed unusual noises or dips in engine performance, it could be time to check and adjust the timing chain tensioner. Don’t worry it’s a task you can handle with the right guidance, a few tools, and some patience. In this article, we’ll walk you through identifying timing chain issues and show you how to adjust the tensioner step by step.
Here’s what you’ll learn: the tools you’ll need, preparation steps, and a clear guide to ensuring your timing chain is perfectly adjusted for optimal performance. Let’s dive in and get your 400EX running like it should!
Table of Contents
The Timing Chain and Its Tensioner: Why They Matter
The timing chain in your Honda 400EX engine is critical for synchronizing the camshaft and crankshaft, ensuring the valves and pistons operate in perfect harmony. This synchronization is vital for the engine’s efficiency and functionality.
However, for the timing chain to perform optimally, it needs to maintain the correct tension. If it’s too loose, it can skip a tooth or hit other components, throwing the engine out of sync. If it’s too tight, it can wear out prematurely or strain the system.
That’s where the timing chain tensioner comes in. This small yet essential component automatically adjusts to compensate for chain stretch over time. It keeps the chain tight enough for smooth operation while avoiding unnecessary stress on the engine. Without the tensioner, the chain would quickly lose alignment, resulting in poor valve timing, rough engine performance, or even total failure.
Signs of a Timing Chain Issue
When the timing chain or tensioner isn’t doing its job, your engine will let you know. Here are some common red flags:
- Rattling or Clicking Noise: A loose timing chain often produces a rattling or clicking sound, especially during startup or idle. It’s like hearing a loose chain clatter against a metal surface unmistakable and impossible to ignore.
- Misfiring: If the timing chain slips, it can throw off the camshaft’s alignment, leading to improper firing of the engine cylinders. This feels like sputtering or inconsistent power delivery.
- Loss of Power: A stretched or slipping chain disrupts the timing, reducing engine efficiency. You might notice a sluggish response or difficulty reaching higher speeds.
- Check Engine Light: Modern motorcycles may have sensors that detect timing issues. If the chain or tensioner is causing misalignment, the engine light could illuminate as a warning.
- Difficulty Starting: In severe cases, a loose or failing chain can make it hard to start the engine because the camshaft and crankshaft aren’t aligned properly.
By understanding the role of the timing chain and tensioner, along with the signs of potential issues, you’re already halfway to diagnosing and fixing problems. So read on to learn how to prepare for adjustments and keep your Honda 400EX running at its best!
Preparing Your Honda 400EX for Timing Chain Tensioner Adjustment
Before you get started, proper preparation is the key to making the process efficient and safe. Think of it as laying the groundwork for success: simple steps now can save you from headaches later.
Step 1: Ensure the Engine is Cool
Working on a hot engine is not only uncomfortable but also risky. Engine components can retain heat for a while after use, so always let your Honda 400EX sit for at least an hour before starting.
- Why This Matters: Metal expands when hot, making bolts and parts harder to remove. Plus, you’ll avoid burns from touching hot surfaces.
- Quick Tip: If you’ve recently ridden your quad, take the time to gather your tools or clean your workspace while waiting for the engine to cool.
Step 2: Position the Vehicle Safely
Stability is essential for working efficiently and avoiding accidents. Ensure your 400EX is on a flat, solid surface where it won’t wobble or shift.
- Use a Stand: A sturdy ATV stand keeps the quad upright and at a comfortable working height. If you don’t have one, ensure the parking brake is engaged, and place wheel chocks behind the tires.
- Clear Your Space: Remove any clutter around the quad to keep your tools organized and reduce the chance of tripping while moving around.
Think of this as setting the stage for a hassle-free adjustment process.
Step 3: Gather Your Tools and Materials
Having everything you need within arm’s reach can save you from unnecessary interruptions mid-task. Double-check your tools and materials before diving in.
Essentials to Have Ready:
- Socket Set: Metric sizes are essential for removing bolts and accessing the tensioner.
- Torque Wrench: Ensures bolts are tightened to manufacturer specifications for precise reassembly.
- Flathead Screwdriver: Useful for prying covers or adjusting components; ensure it’s in good condition.
- Allen Wrenches (Hex Keys): Needed for hex bolts on smaller components; a complete set covers all sizes.
- Needle-Nose Pliers: Ideal for handling small parts like clips or cotter pins without damage.
- Breaker Bar (Optional): Provides extra leverage for loosening tight or stuck bolts.
- Service Manual: Provides torque settings, diagrams, and instructions tailored to the Honda 400EX.
- Replacement Gaskets: Necessary if covers are removed; prevent oil leaks during reassembly.
- Cleaner/Degreaser: Keeps components clean and reduces contamination risks.
- Rags/Shop Towels: For cleaning surfaces and catching oil drips.
- Lubricant: Helps loosen stubborn bolts or ensures smooth reassembly.
- Gloves and Safety Gear: Protect hands and eyes during the process.
- Magnetic Tray: Keeps small parts organized and prevents loss.
- Flashlight/Headlamp: Ensures good visibility in tight engine areas.
- Multimeter: Checks battery and electrical connections if needed.
Taking the time to cool your engine, stabilize your quad, and prepare your tools will set you up for success. Now here comes the good part, learning how to access and adjust the timing chain tensioner with ease. Let’s get started!
Step-by-Step Guide to Adjust the Timing Chain Tensioner
Adjusting the timing chain tensioner on your Honda 400EX is a hands-on task, but following these steps ensures you get it done right. Let’s dive in and take it one step at a time.
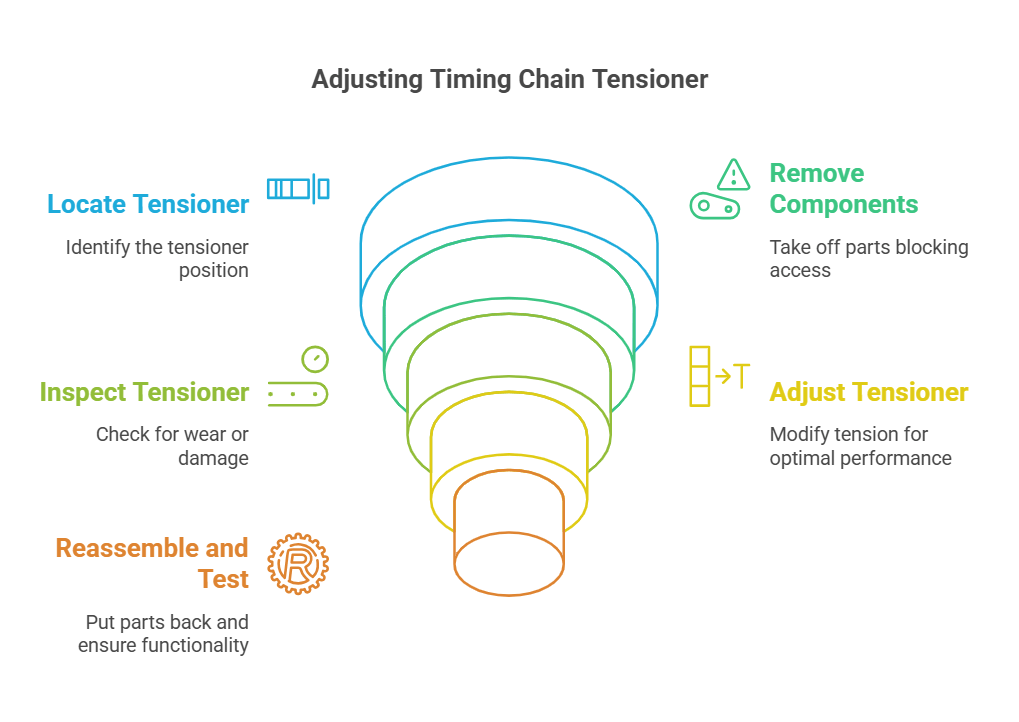
Step 1: Locate the Timing Chain Tensioner
The timing chain tensioner is typically on the side of the engine, near the cylinder.
- Look for the Cover: On the Honda 400EX, the tensioner is protected by a small cover held in place with bolts. Refer to your service manual for the exact location.
- Clear the Area: Wipe away dirt or debris from the surrounding area to ensure a clean workspace and prevent contamination when you remove components.
Think of this step as finding the starting line it’s the foundation for the entire process.
Step 2: Remove Necessary Components
To access the tensioner, you may need to remove parts that are in the way.
- Start with the Cover: Use a socket or wrench to remove the bolts holding the tensioner cover. Keep these bolts organized to avoid misplacing them.
- Watch for Gaskets: If the cover uses a gasket, check its condition. A damaged gasket may need replacement to prevent oil leaks later.
- Clear Additional Obstacles: If other components block access, such as a skid plate or hoses, remove them carefully to avoid damaging nearby parts.
Removing these components is like peeling back layers you’re getting closer to the core.
Step 3: Inspect the Timing Chain Tensioner
Before making adjustments, check the tensioner’s condition to ensure it’s functioning properly.
- Check for Damage: Look for signs of wear, such as broken or bent parts, corrosion, or oil leaks.
- Test the Mechanism: Gently push the tensioner to see if it moves smoothly. A stuck or overly loose tensioner may need repair or replacement before proceeding.
- Inspect the Chain: While you’re here, glance at the timing chain for signs of wear, such as stretching or uneven tension.
Think of this step as a health check ensuring everything is in good shape before proceeding.
Step 4: Adjust the Tensioner
Now comes the heart of the process: adjusting the tensioner. Follow the method specific to your tensioner type.
Manual Tensioners
- Loosen the Lock Nut: Use the appropriate tool to loosen the lock nut on the tensioner, allowing for adjustment.
- Turn the Adjuster Bolt: Gradually tighten the adjuster bolt until the chain feels snug. Avoid overtightening, as this can strain the chain and components.
- Secure the Setting: Once adjusted, tighten the lock nut to hold the tensioner in place. Double-check the tension to ensure it’s correct.
Automatic Tensioners
- Reset the Mechanism: For automatic tensioners, you may need to reset the spring-loaded mechanism. Push or turn the plunger to its default position.
- Reinstall and Check Engagement: Put the tensioner back in place, ensuring it engages with the chain properly. The automatic tensioner will adjust itself as needed.
Whether manual or automatic, this step ensures your timing chain is operating at optimal tension.
Step 5: Reassemble and Test
With the adjustment complete, it’s time to put everything back together and confirm the results.
- Replace the Cover: Reinstall the tensioner cover, ensuring the gasket (if applicable) is properly seated to prevent leaks. Tighten bolts to the torque specifications listed in your service manual.
- Reinstall Other Components: If you removed other parts, such as a skid plate or hoses, reattach them securely.
- Test the Engine: Start the engine and listen for any abnormal noises. A properly adjusted tensioner should eliminate rattling or clicking sounds.
- Fine-Tune If Necessary: If the chain still sounds loose or overly tight, repeat the adjustment process.
Reassembly is like closing the book on the process; it wraps everything up and gets your 400EX ready to hit the trail again.
Adjusting the timing chain tensioner might seem daunting, but by following these steps carefully, you’ll ensure your engine runs smoothly and efficiently. Take your time, double-check your work, and enjoy the results of a well-tuned engine!
Troubleshooting Common Issues
Even after adjusting the timing chain tensioner, you might run into a few hiccups. Don’t worry, these problems are common and often easy to resolve. Let’s take a closer look at the typical issues and how to address them.
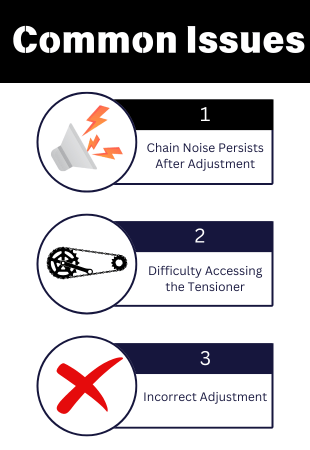
Chain Noise Persists After Adjustment
Hearing the same rattling or clicking sounds even after adjustment can feel frustrating, but it’s a sign something else may be going on.
- Worn Timing Chain: If the chain is stretched or has excessive wear, it won’t maintain proper tension even with a fully adjusted tensioner. Check for visible sagging or uneven links.
- Faulty Tensioner: A worn or damaged tensioner might not hold its adjustment. Look for signs of internal failure, such as a weak spring or a plunger that doesn’t hold steady.
- Missed Adjustment: Double-check your adjustment process. Even a small error, like under-tightening or skipping a step, can leave the chain loose.
If the noise persists, take a closer look at the chain and tensioner; they might need replacement instead of adjustment.
Difficulty Accessing the Tensioner
Sometimes, the hardest part of the job is simply getting to the tensioner.
- Obstructions in the Way: Components like hoses, plates, or covers can block your access. While removing them adds time, it’s often the safest way to avoid damaging nearby parts.
- Tight Spaces: Working in a confined area can make it tough to maneuver tools. Using smaller tools or extensions for your wrenches can make the task easier.
- Seized Bolts: If bolts are stuck or hard to turn, apply penetrating oil and give it time to loosen. A breaker bar can help with stubborn bolts without stripping or snapping them.
Patience and the right tools will save you from unnecessary frustration when tackling tricky spots.
Incorrect Adjustment
An improperly adjusted tensioner can lead to new issues or fail to resolve existing ones.
- Over-Tightened Chain: A chain that’s too tight puts stress on the sprockets, bearings, and tensioner itself. This can lead to accelerated wear or even engine damage. If the engine feels strained or makes new noises, recheck the adjustment.
- Under-Tightened Chain: A loose chain can slap against components or skip teeth on the sprockets, causing misalignment and rattling. Ensure the tension is snug without excessive slack.
- Missed Reset on Automatic Tensioners: For automatic systems, failing to properly reset the tensioner mechanism can prevent it from engaging fully with the chain.
Carefully following the adjustment steps and rechecking your work can help prevent these problems.
Troubleshooting these issues doesn’t have to feel like guesswork. Address persistent noise by inspecting the chain and tensioner closely, handle access challenges with the right tools and approach, and double-check your adjustments to ensure everything is set correctly. Now here comes the good part: your Honda 400EX should be running smoothly and ready to tackle the trails again!
Maintenance Tips for Prolonging Timing Chain Life
Keeping your Honda 400EX’s timing chain in good shape doesn’t have to be a chore. With a little regular care, you can extend its life and avoid costly repairs. Here are five simple yet effective tips:

- Change Your Oil Regularly
Clean oil reduces friction and keeps the timing chain and tensioner running smoothly. Dirty or old oil can lead to buildup and accelerated wear. Stick to the recommended oil change intervals in your owner’s manual.
- Listen for Unusual Noises
Rattling or clicking sounds from the engine could mean the timing chain or tensioner needs attention. Don’t ignore these warning signs; they’re your engine’s way of asking for help.
- Inspect the Chain Periodically
During routine maintenance, take a look at the timing chain for signs of wear, like sagging or uneven tension. Catching a problem early can prevent more significant damage later.
- Keep the Tensioner in Good Condition
A faulty tensioner can’t do its job, leading to a loose or overly tight chain. Check it during servicing and replace it if it shows signs of wear, like weak engagement or leaking oil.
- Use High-Quality Parts
Whether it’s replacement chains, oil, or tensioners, choose high-quality components that meet or exceed manufacturer specifications. Cheap alternatives may save money upfront but can wear out faster and cause bigger problems.
Following these tips will keep your timing chain running like clockwork and save you time, money, and frustration. So read on to learn more about keeping your Honda 400EX in peak condition!
Conclusion
Adjusting the timing chain tensioner on your Honda 400EX is not just about silencing unwanted noises it’s about ensuring your engine operates at peak performance. By taking the time to check and adjust the tensioner, you’re safeguarding the heart of your quad against unnecessary wear, loss of power, and potential damage.
Remember, proper timing isn’t just a mechanical requirement; it’s the key to smooth rides and dependable performance. With the right tools, a little patience, and the guidance from this article, you can handle this task confidently and keep your 400EX running like it was meant to.
So, the next time you hear that unmistakable rattle or feel a dip in performance, you’ll know exactly what to do. Mastering this adjustment is more than just maintenance it’s about getting the most out of every ride. Keep your engine in sync, and the trails will always be yours to conquer!